

This guide explains how to download, install, and launch Wireshark on a Windows operating system.
Prerequisites
Before you begin, make sure you have:
-
A Windows computer with administrator access.
-
An active internet connection.
-
Permission to install software on the computer.
Follow the steps below:
Step 1. Download Wireshark
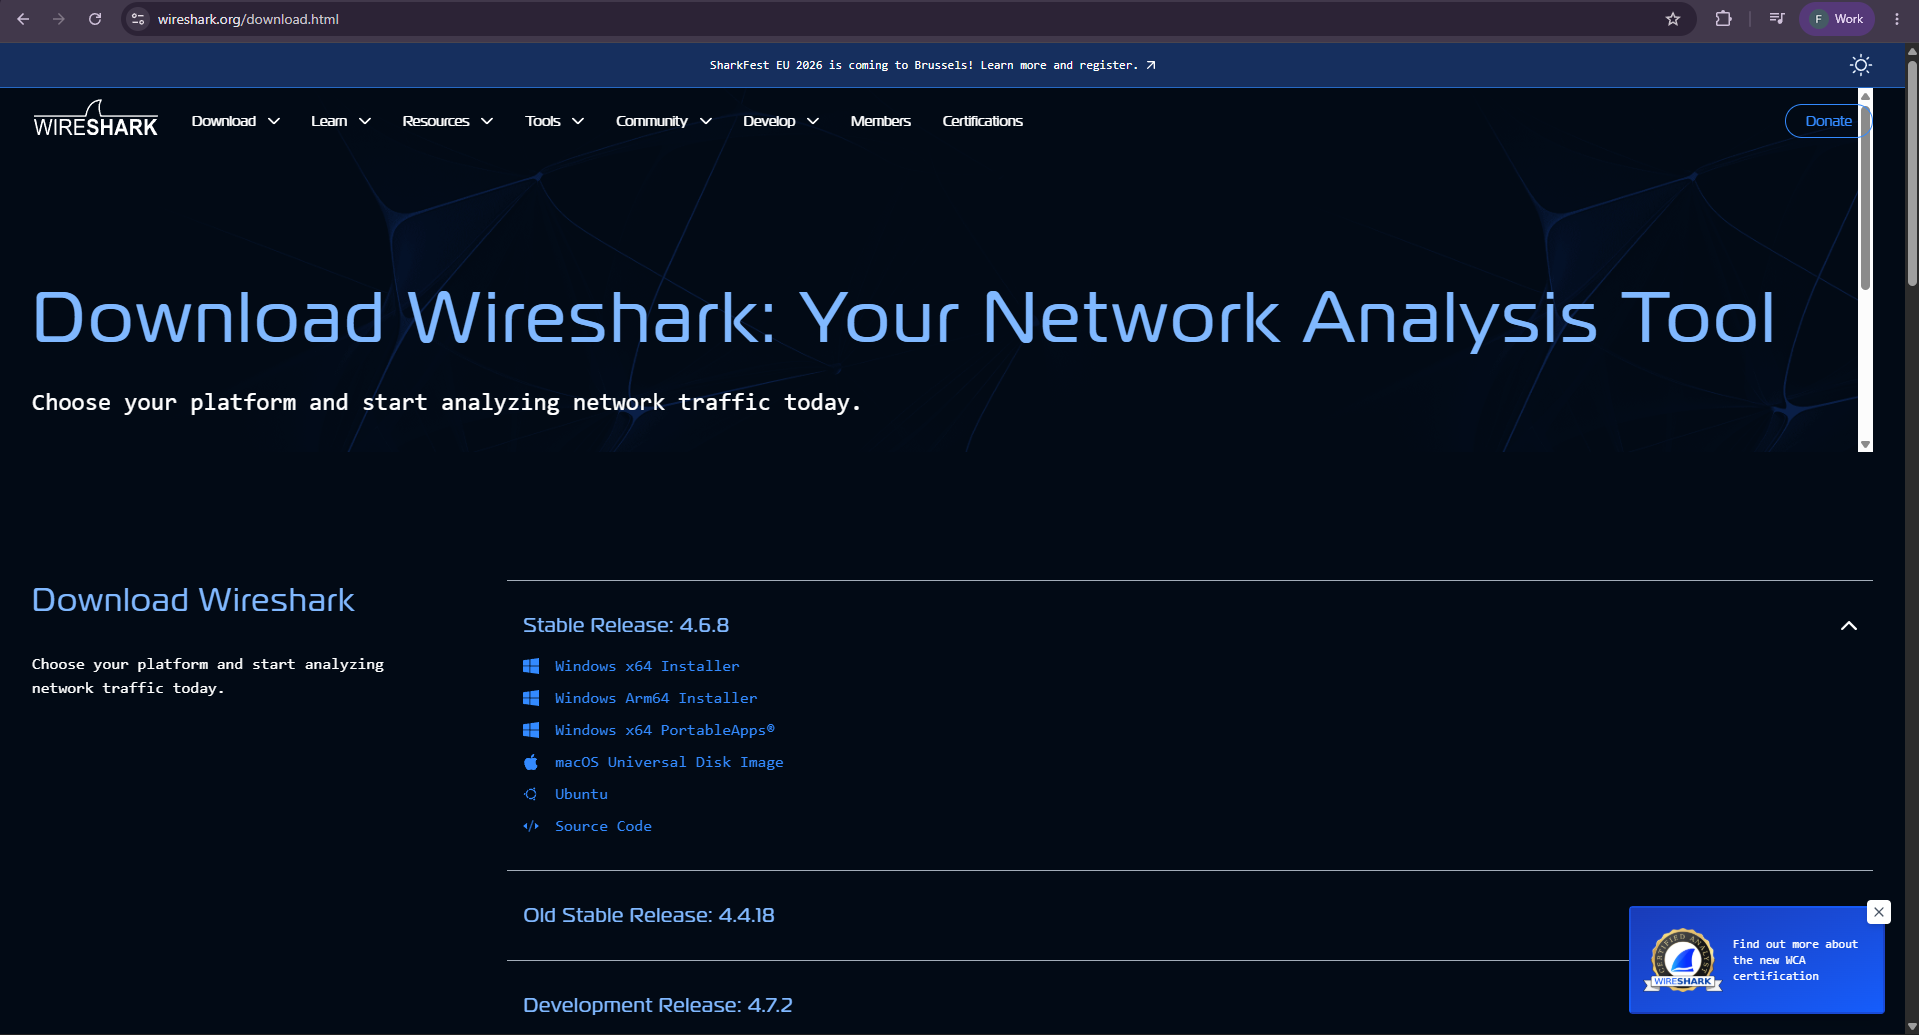
Open the official Wireshark download page:
https://www.wireshark.org/download.html
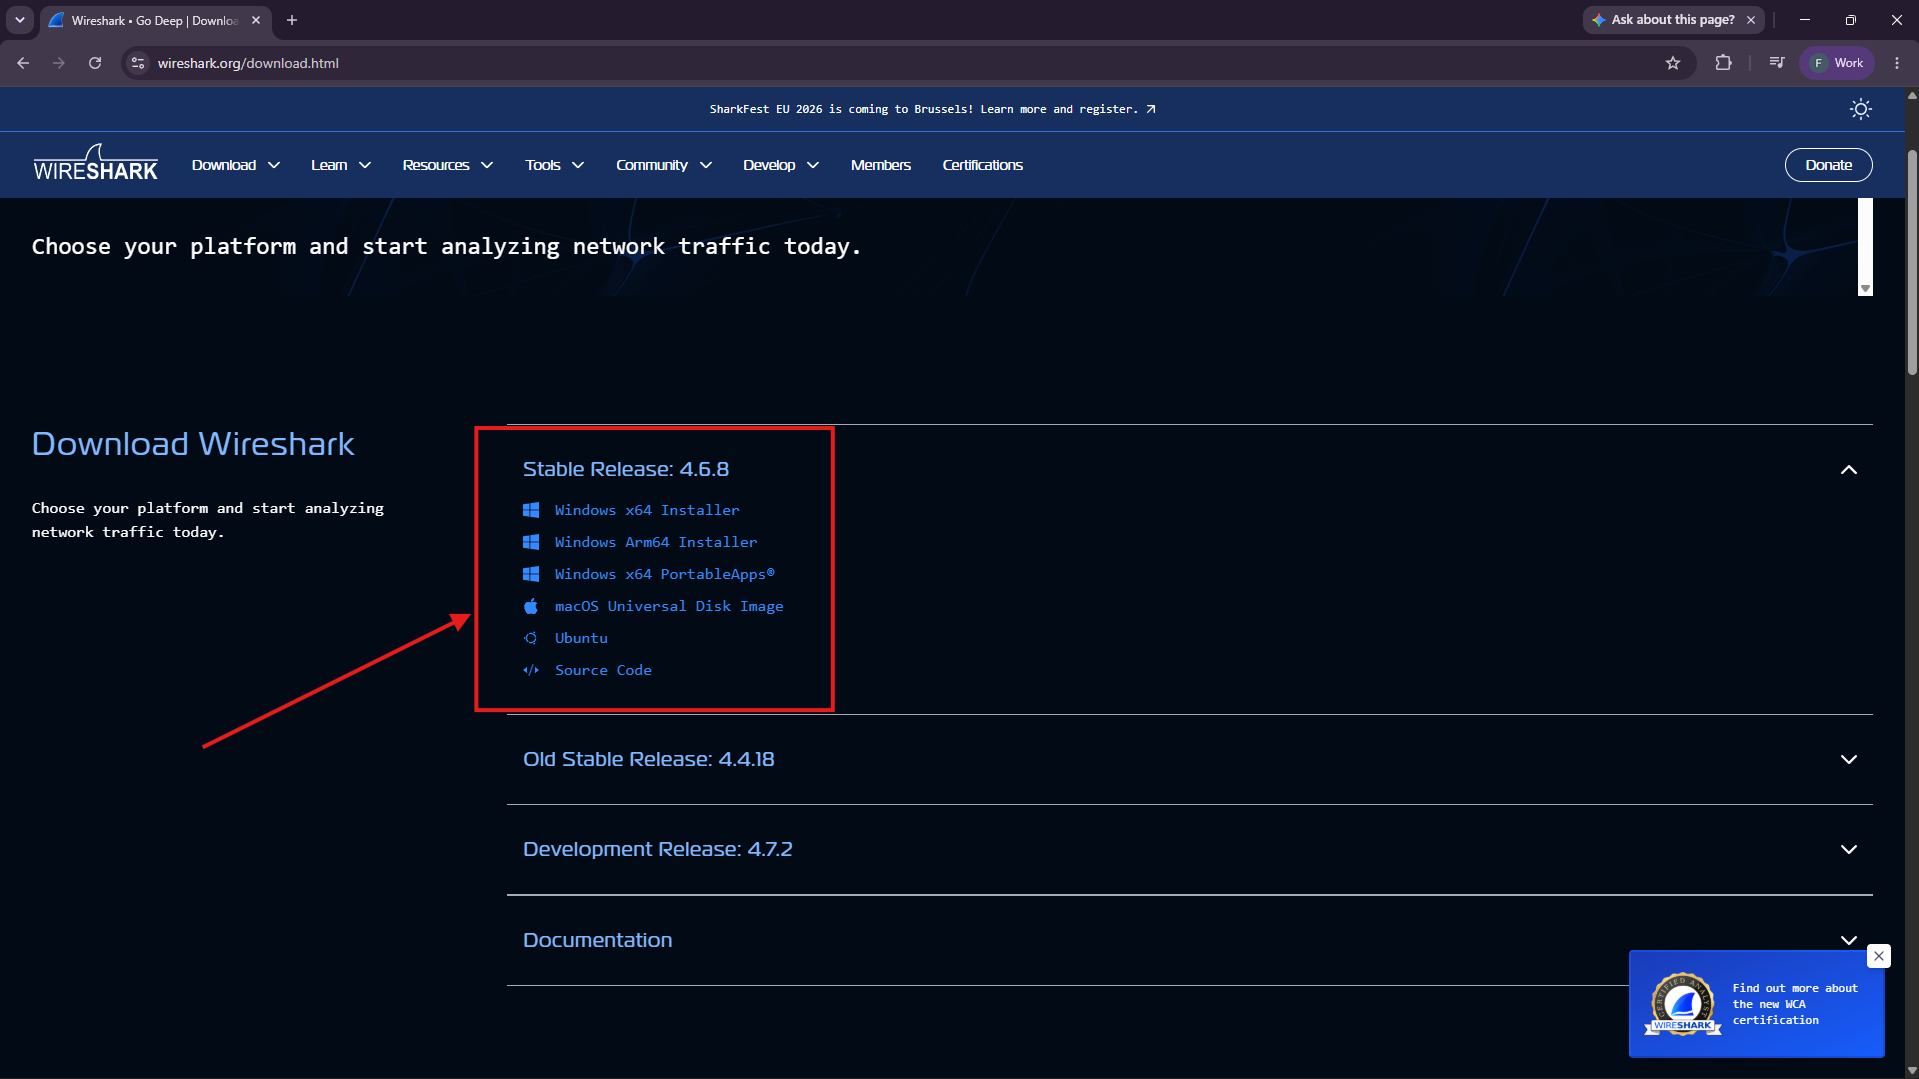
Select the appropriate Windows installer for your system.
Step 2. Download the Installer
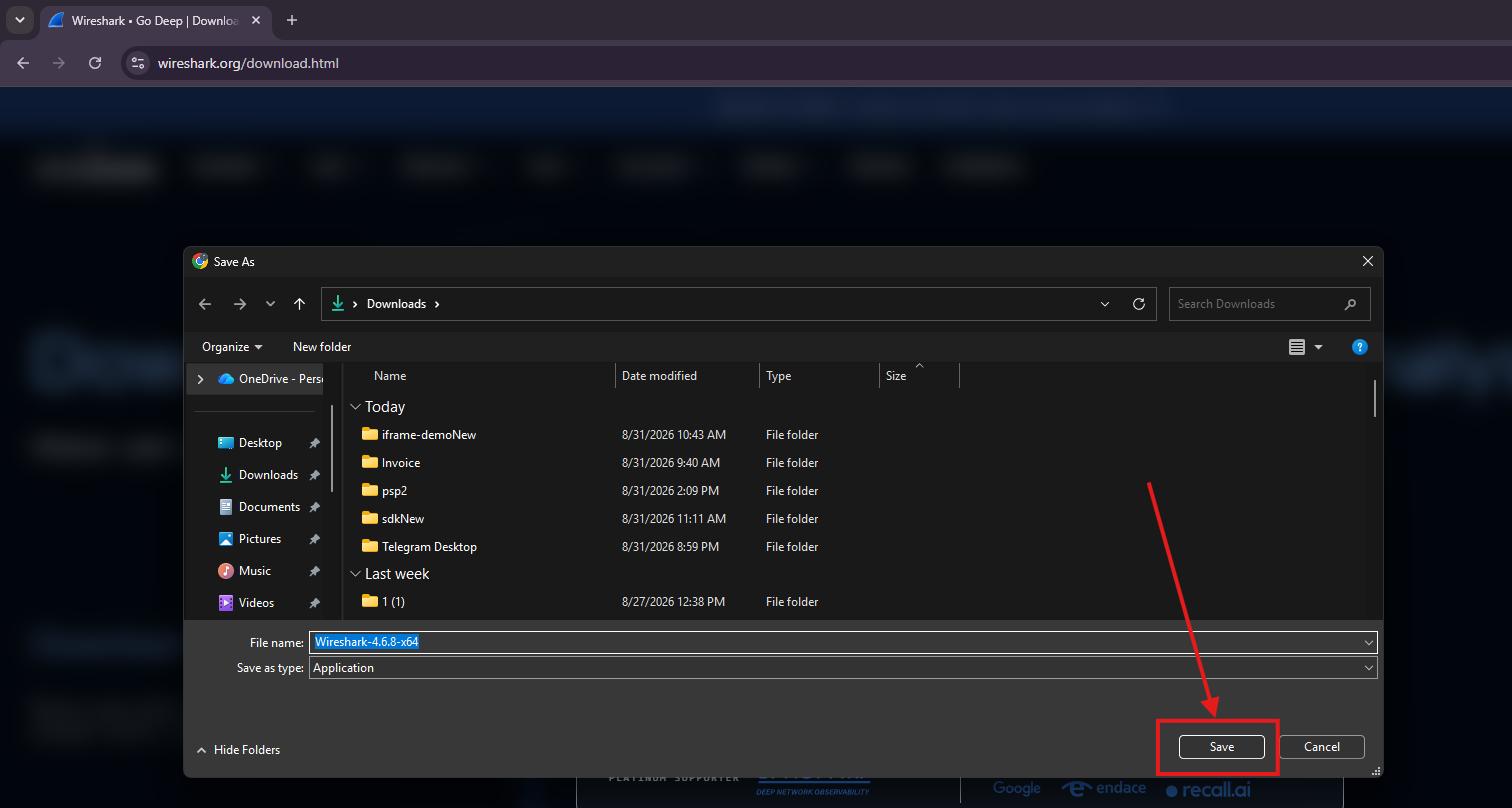
Select the preferred Wireshark version and download the Windows installer.
Choose a location on your computer where you want to save the installer.
Step 3. Launch the Installer
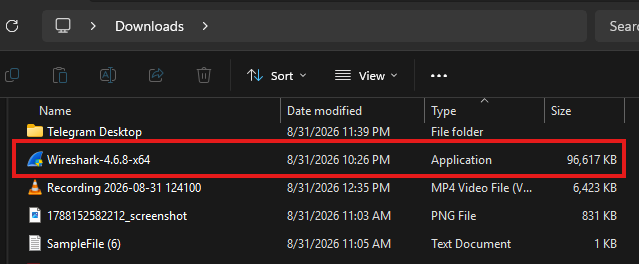
Once the download is complete, navigate to the location where the installer was saved.
Double-click the downloaded .exe file to start the installation.
Step 4. Install Wireshark
Follow the installation wizard to install Wireshark.
-
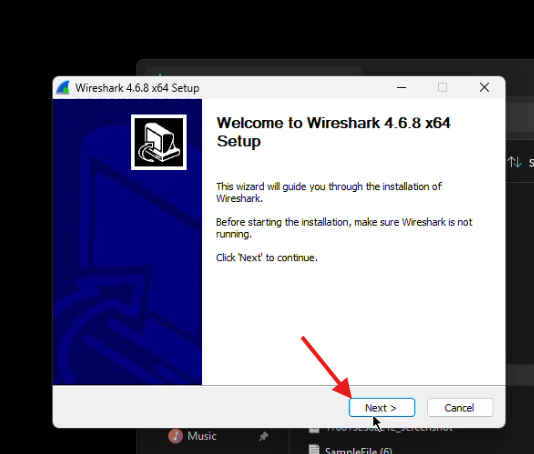
Continue with the Installation. Click Next to proceed.
-
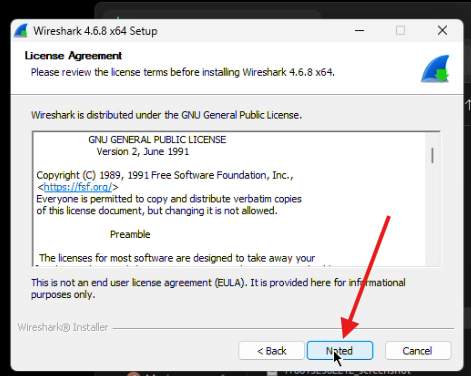
Review the license agreement and click Noted to continue.
-
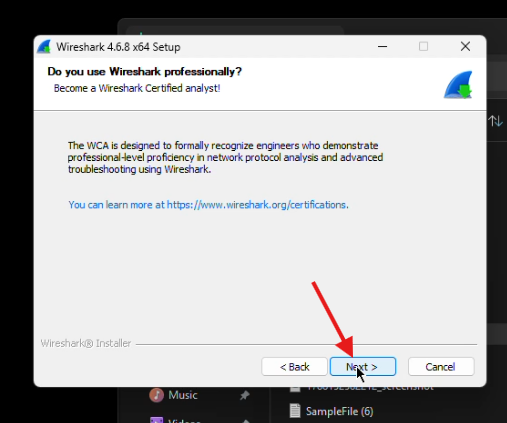
Click Next.
-
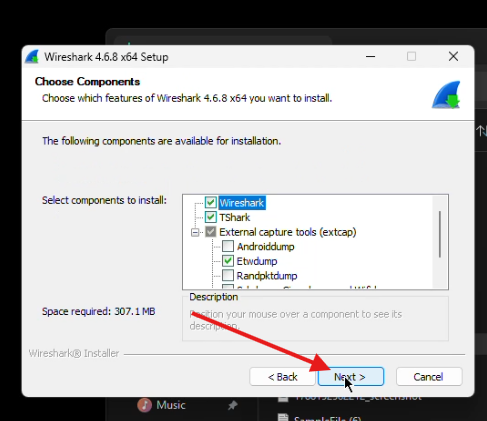
Click Next to proceed with the default installation settings.
-
Check the Wireshark Desktop Icon option if you want to create a shortcut on your desktop. Click Next.
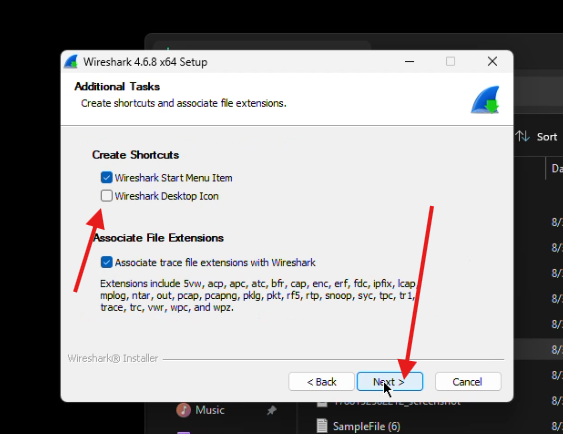
-
Click Next to continue.
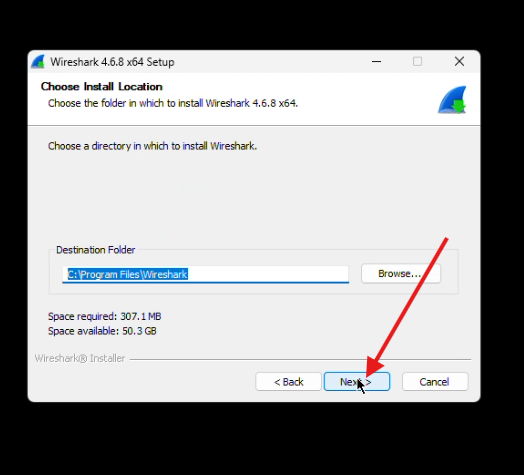
-
Install Npcap
Wireshark requires Npcap to capture network traffic on Windows.
If Npcap is not already installed on your system, make sure Install Npcap is selected. Click Next.
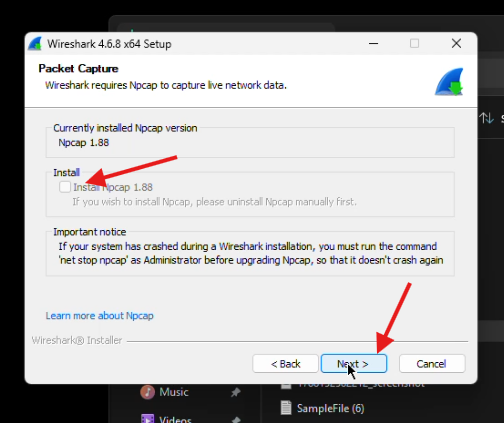
-
Click Install to begin installing Wireshark.
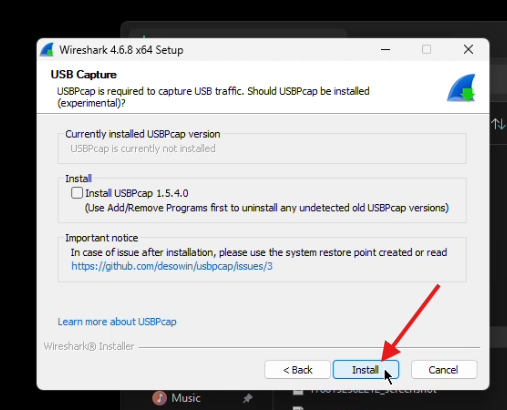
-
Complete the Installation
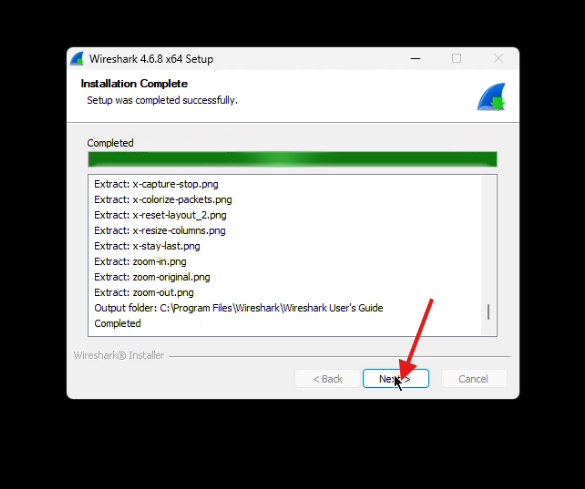
Wait for the installation process to complete. If prompted to continue or proceed with the Npcap installation, follow the on-screen instructions.
Click Next when prompted.
-
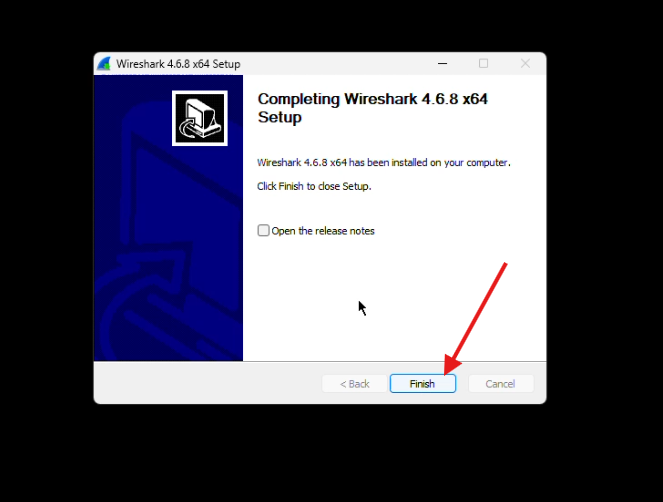
Once the installation is complete, click Finish.
Step 5. Launch Wireshark
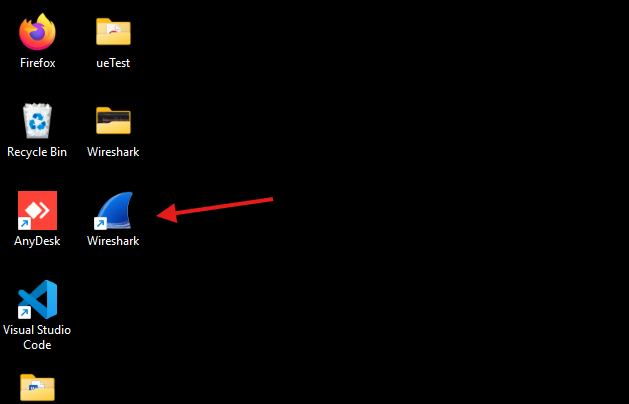
After installation is complete, locate the Wireshark shortcut on your desktop.
Double-click the shortcut to launch the application.
Step 6. Verify the Installation
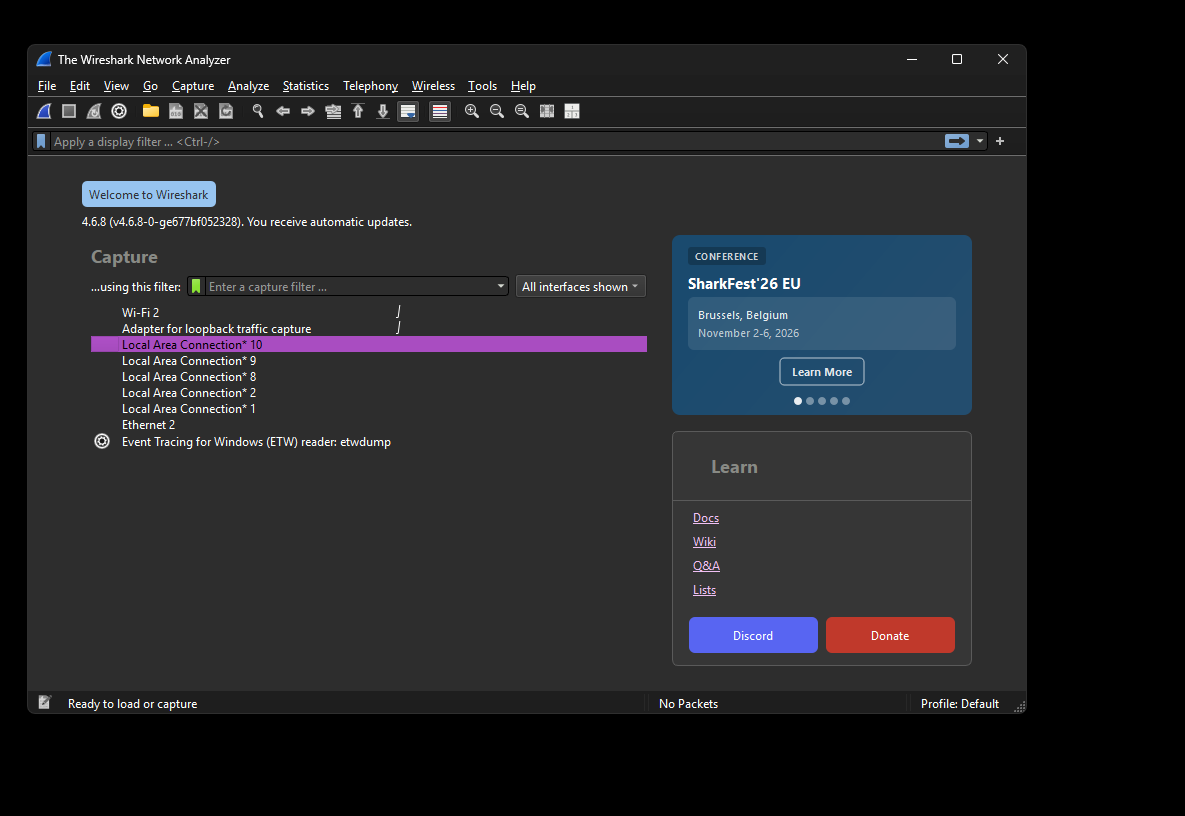
After launching Wireshark, the main application window should appear.
You can now use Wireshark to capture and analyze network traffic.
Step 7. Capture Your First Packets
Now that Wireshark is installed, you can capture real network traffic from a website.
-
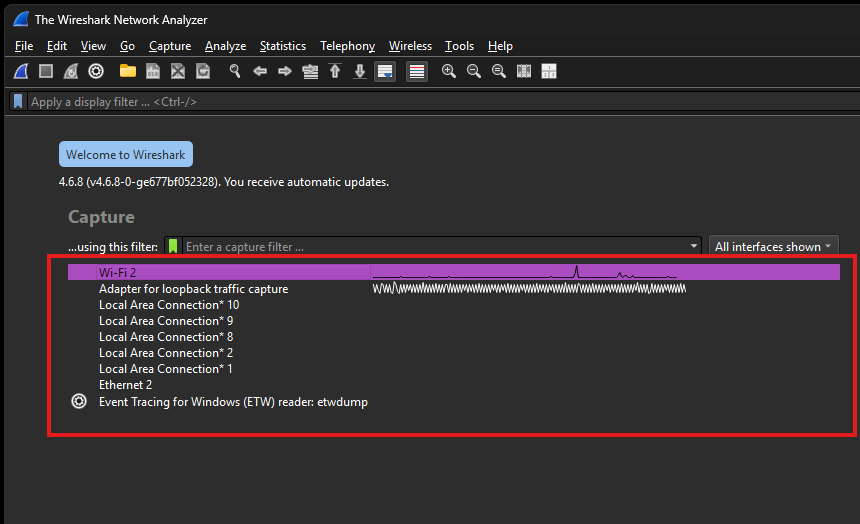
Select Your Network Interface
When Wireshark opens, you will see a list of available network interfaces.
Select the interface that is connected to the internet. This is usually Wi-Fi or Ethernet, depending on how your computer is connected.
A moving graph or line next to an interface indicates that network traffic is flowing through it.
-
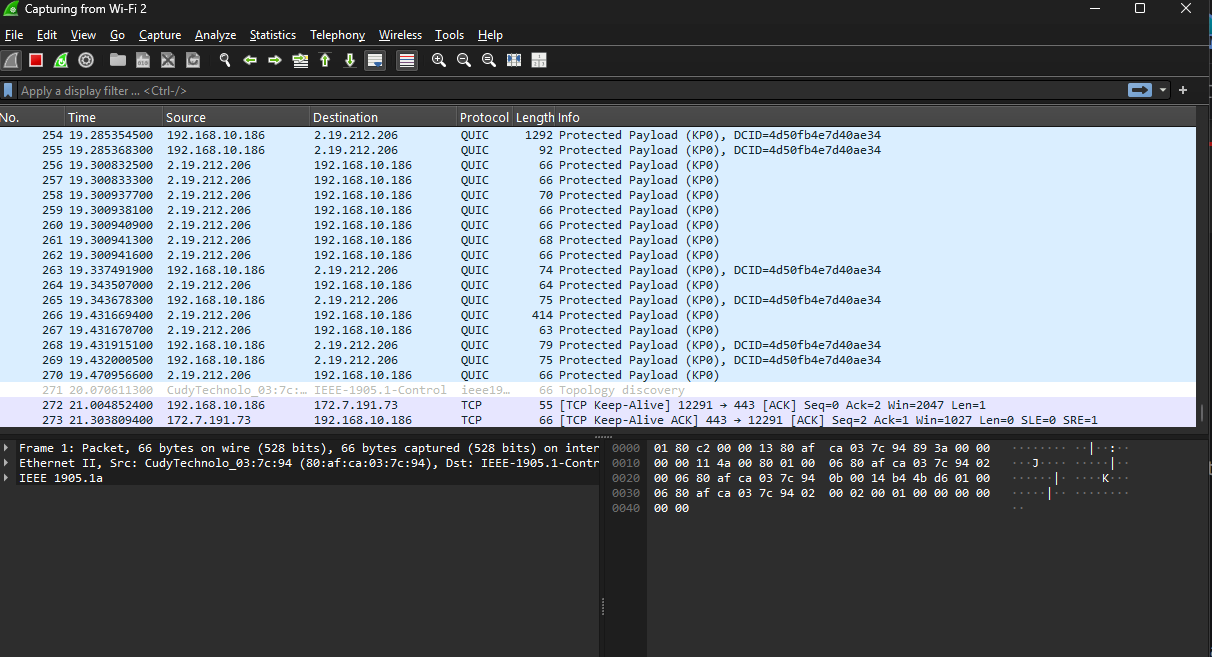
Start the Capture
Double-click the Wi-Fi interface, or select it and click the blue shark fin button.
Wireshark will immediately begin capturing network packets.
-
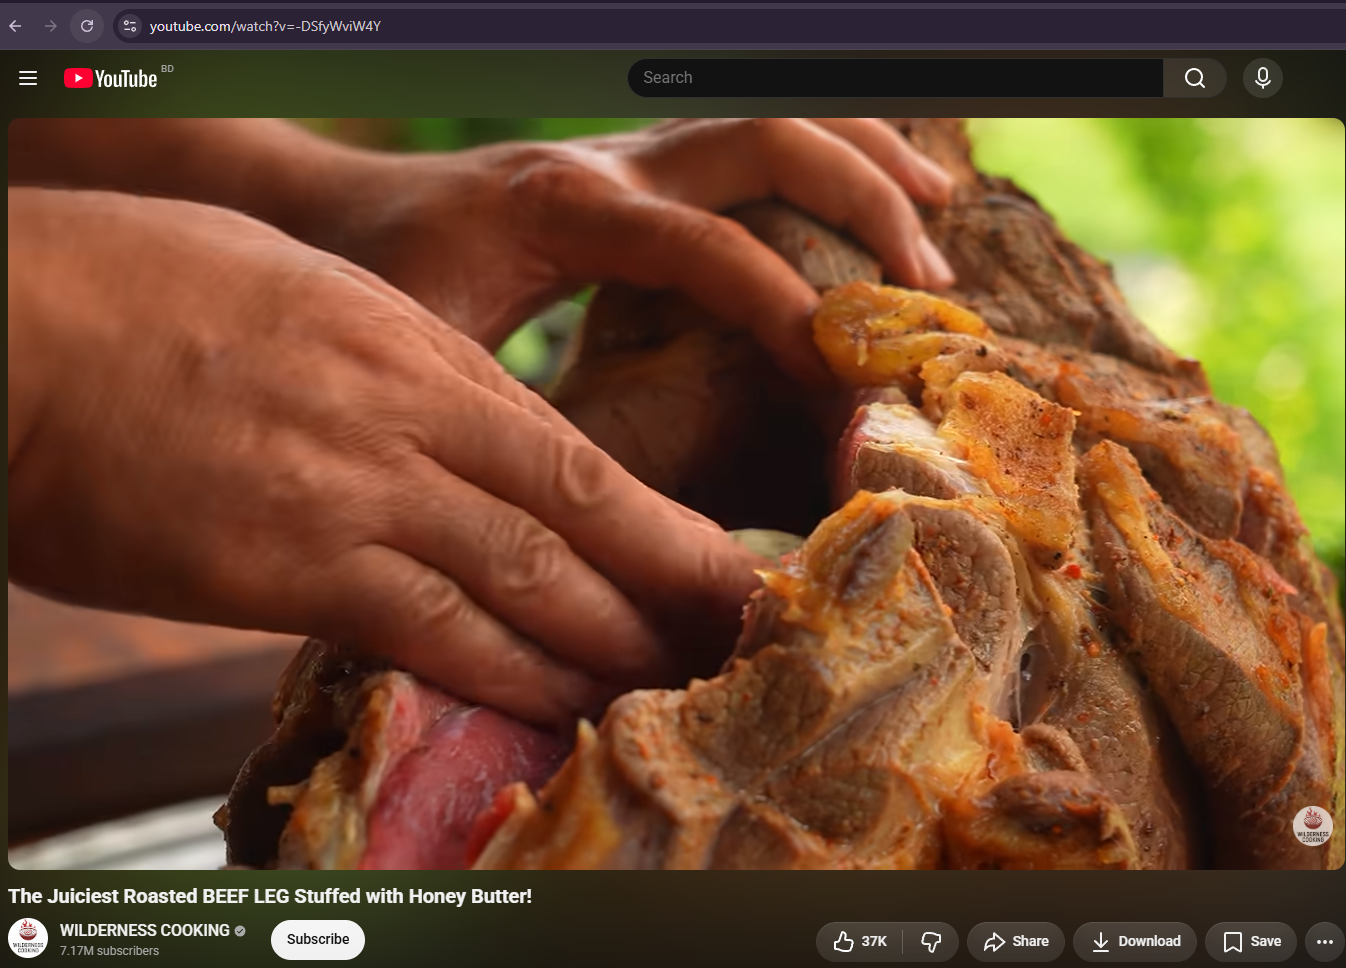
Open YouTube
Leaving Wireshark running, open your browser, go to http://youtube.com , and play any video for about 10 seconds.
-
Stop the Capture
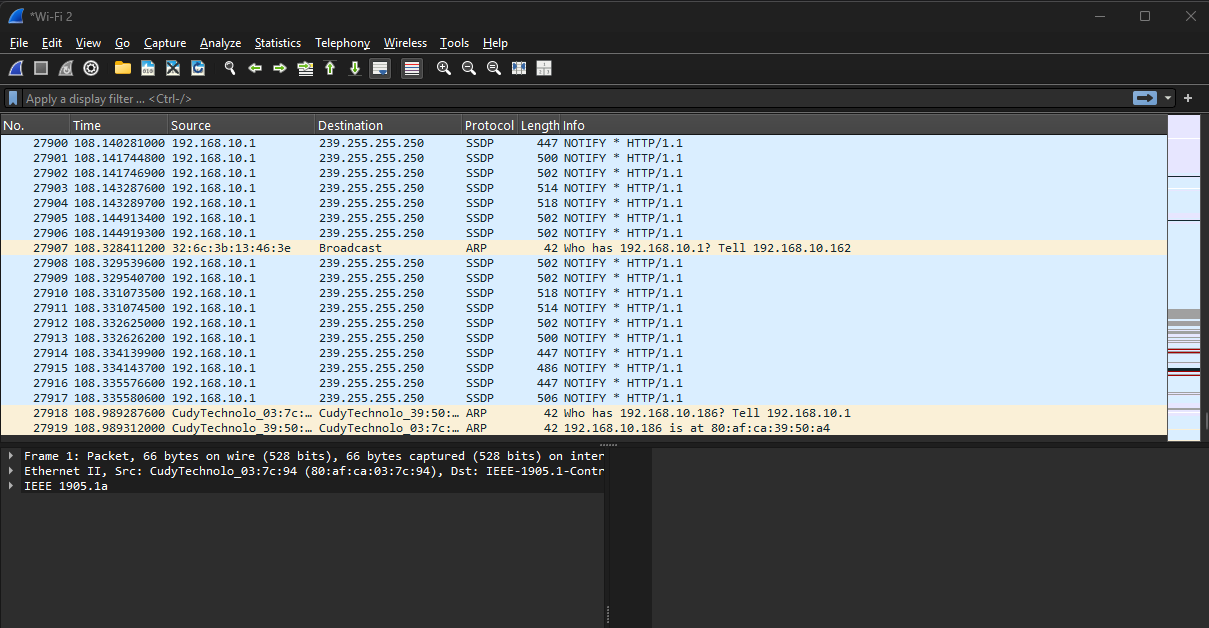
Return to Wireshark and click the red square button to stop the packet capture.
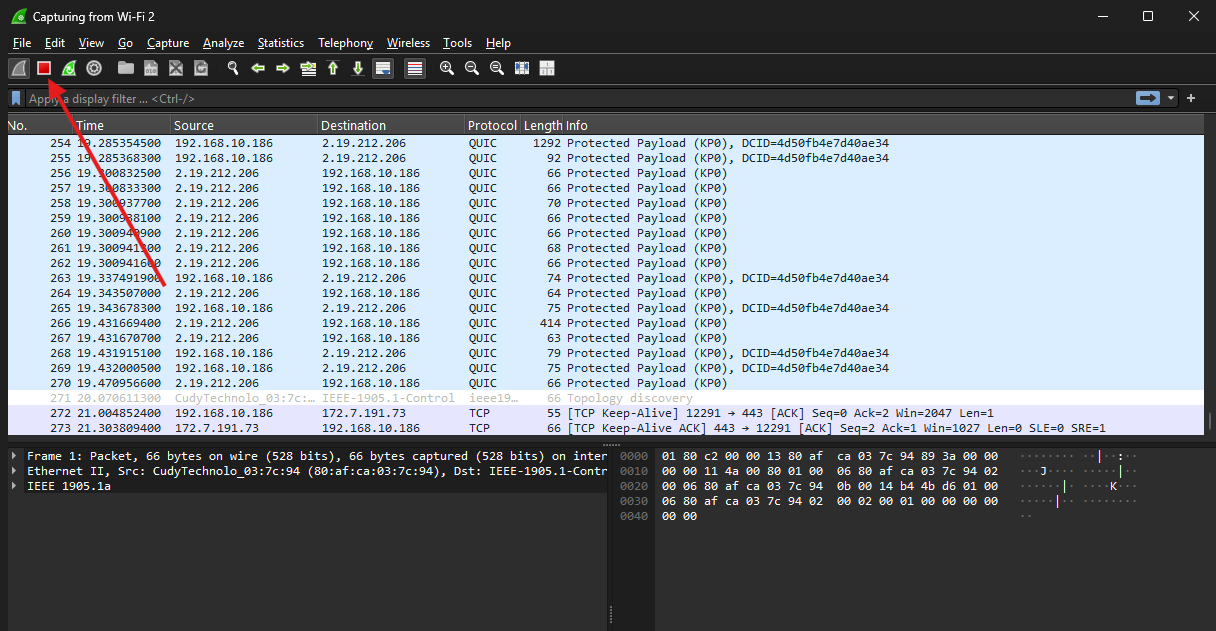
The captured packets will remain visible in the packet list.
-
Read the Packet List
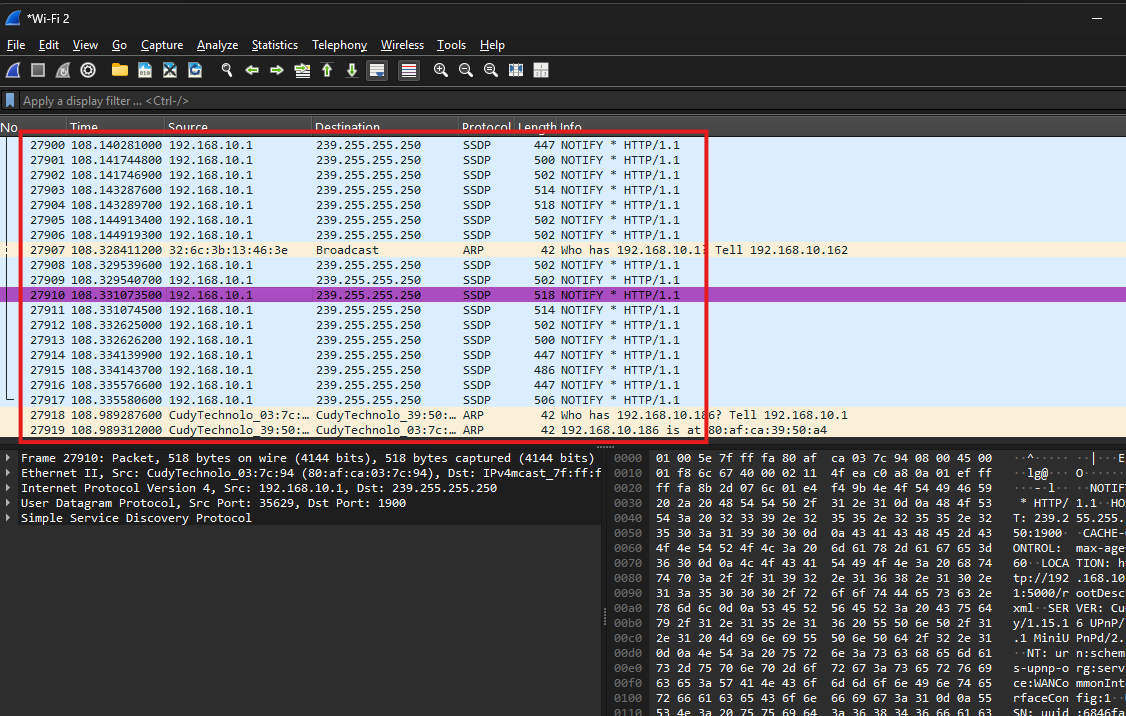
Each row in the packet list represents one captured network packet.
The main columns are:
|
Column |
Meaning |
|---|---|
|
No. |
Packet number in the capture |
|
Time |
Time elapsed since the capture started |
|
Source |
Where the packet came from |
|
Destination |
Where the packet is going |
|
Protocol |
The network protocol used by the packet |
|
Length |
Size of the packet in bytes |
|
Info |
A brief description of what the packet is doing |
Your laptop’s own address appears in the Source column when it sends, and in the Destination column when it receives.
-
Filter the Results
A packet capture can contain thousands of packets, making it difficult to find specific traffic.
You can use Wireshark's Display Filter bar at the top of the window to filter the results.
For example, enter:
dns
Then press Enter.
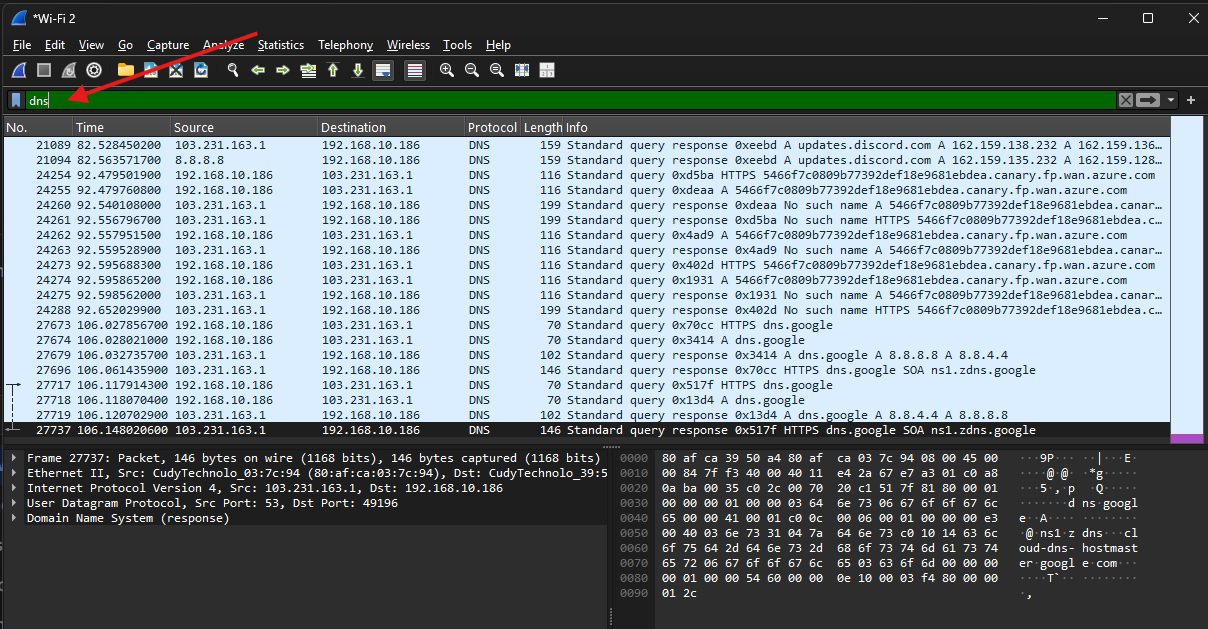
Wireshark will now display DNS-related packets.
Look for a DNS query related to the website you visited, such as https://www.youtube.com/ The query represents your computer requesting the IP address associated with a domain name. A corresponding DNS response contains the requested address information.
You can use other Wireshark display filters to analyze different types of network traffic.
Why You Cannot See the Video Data
If you select a packet associated with YouTube and inspect the packet details, you may notice that the actual video content is not readable.
This is because the connection is encrypted.
Wireshark can still show information such as:
-
The source and destination of network traffic.
-
The protocols being used.
-
The amount of data being transferred.
-
When packets are sent and received.
However, Wireshark cannot normally display the actual contents of encrypted HTTPS traffic.
This encryption helps protect the privacy and security of your web browsing.
Step 8. Save the Capture File
You can save the captured network traffic to your local disk for later analysis or for sharing with a support or development team.
Click File → Save As.
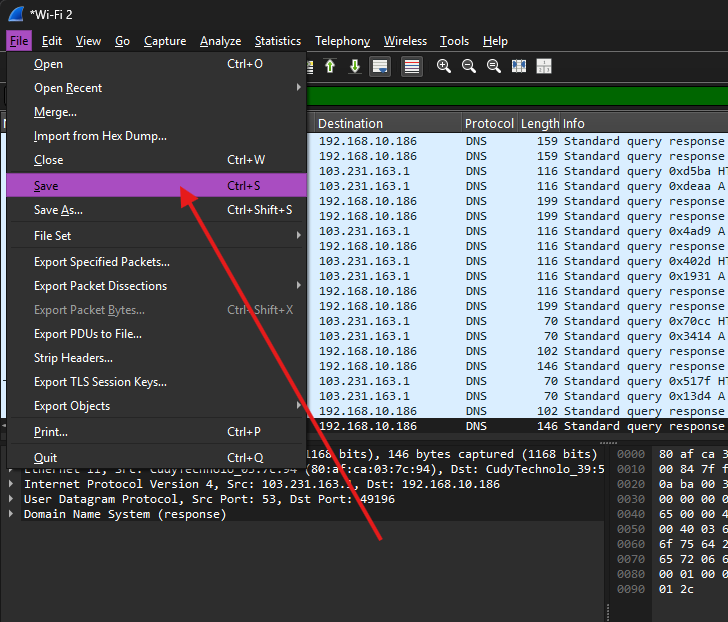
Choose the location where you want to save the capture file. Enter a file name and click Save.
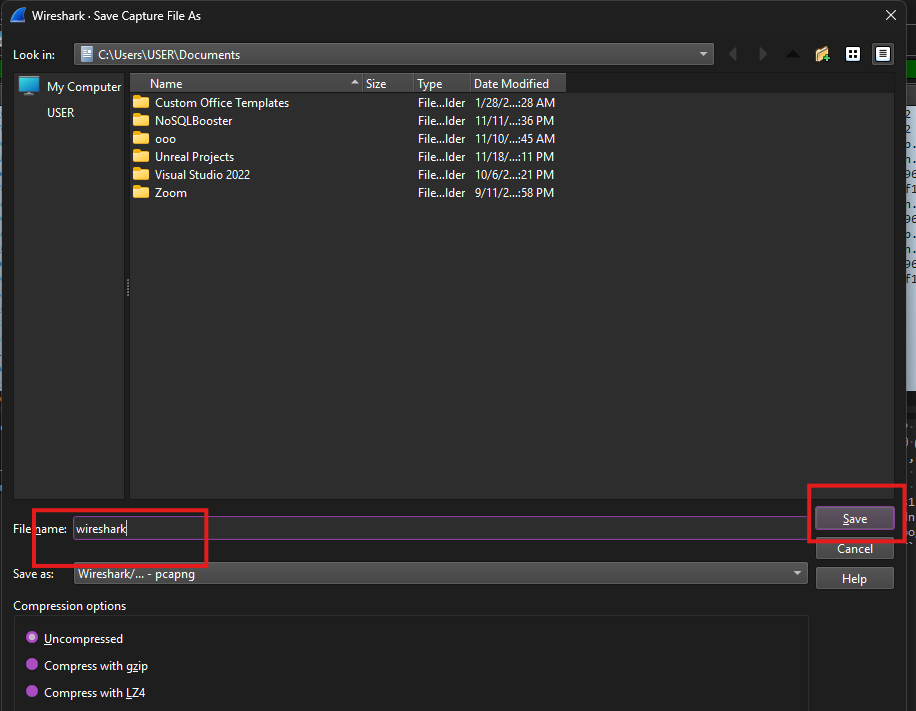
Wireshark typically saves packet captures using the .pcapng file format.
You can later open the saved file in Wireshark to review and analyze the captured network traffic.