In this document, we will guide you through preparing the Convai Unreal Engine project for Pixel Streaming, enabling microphone input for streaming sessions.
Demo Project
Download the demo project here: Convai Demo Project
Follow the guidelines below:
Part 1. Configure the Character Blueprint
-
Open the Convai project in Unreal Engine.
-
Navigate to your character’s blueprint (e.g.,
BP_Character). -
Add the PixelStreamingAudio component to your blueprint.
-
Add the following nodes in the Event Graph to handle audio streaming:
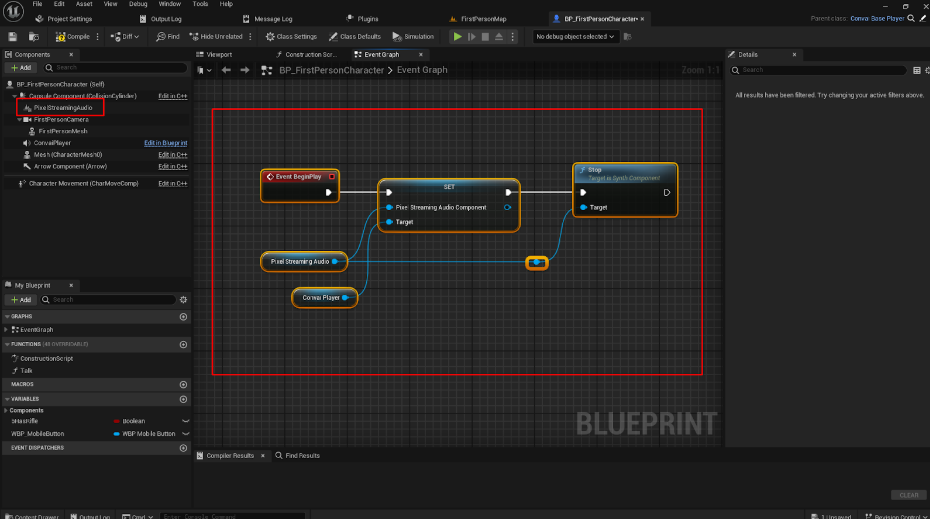
Figure 1. Add the following Nodes
-
Connect the nodes properly and save your blueprint.
-
Disable Use Pixel Streaming Mic Input in the component settings.
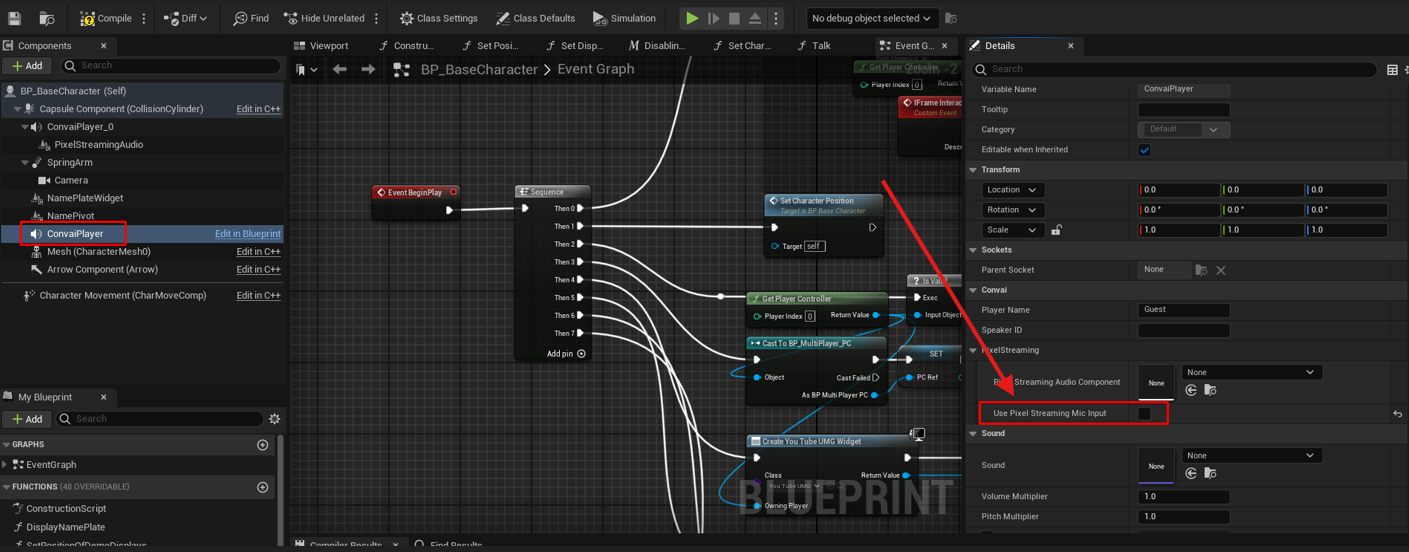
Figure 2. Disable Use Pixel Streaming Mic Input
Part 2. Local Testing
-
Package the game and test it locally.
-
Check if the microphone input is working as expected during local testing.
Expected Result:
You should be able to speak, and the audio should be captured by the Pixel Streaming setup.
Part 3. Upload to Eagle Control Panel
-
Open the Eagle Control Panel
-
Upload your packaged project.
-
After the upload completes, create a new configuration for your project.
-
Enable the Browser Microphone option in the configuration. Refers to following doc to Enable Browser Microphone
Next Steps
Once the configuration is set up with Browser Microphone enabled, your Convai project is ready for Pixel Streaming with audio input. You can now start streaming the project and test the microphone functionality in real time.
Need help?
🛠️ Contact our Support Team
💬 Join the Community on Discord
Follow us on: